
GitHubはメンバーにRoleを設定することで、許可する権限の範囲を細かく設定できます。
権限の適材適所な設定はチーム開発で必須です。チームの成果物であるデータを守ることに繋がります。
Roleの設定はGitHubのWebページからGUIで行えますが、操作する箇所が分散していて、とても見通しが悪く難解です。
ですので、Roleの種類と設定方法を整理してみました。
※環境:GitHubユーザーページ ’25/10現在
目次
Roleと許可される権限
Organization、Team、Repositoryの各区分で、メンバーにRole(役割)を設定できます。
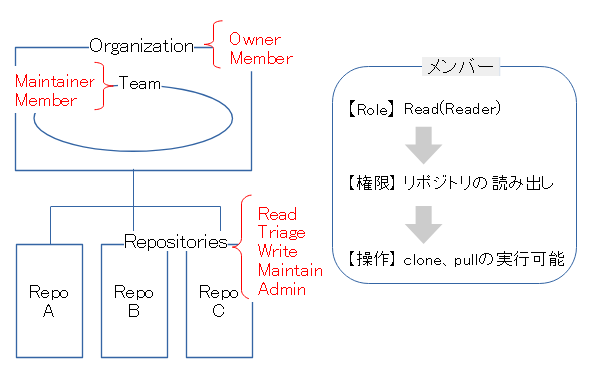
Roleにより、メンバーに許可される権限が決まり、行える操作が付与されたり制限されたりします。
Organizationに対するRole
Organizaionに対するメンバーのRoleです。
Roleの概要
OwnerとMemberの2つのRoleがあります。
Organizationの作成者は必然的にOwnerです。また、招待されたメンバーは招待時に選択したRoleになります。
| Role名 | 許可される権限 |
|---|---|
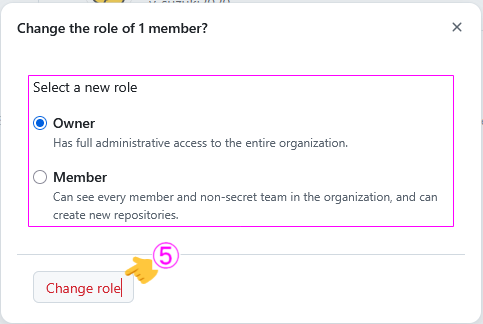
| Owner | Has full administrative access to the entire organization. ----- Organizationに対する全ての操作(完全な管理アクセス権を持つ) |
| Member | Can see every member and non-secret team in the organization, and can create new repositories. ----- 全てのメンバーの参照 全てのチームの参照(秘密チームを除く) リポジトリの作成 |
Organization当たり2名のOwnerを持つように、GitHubは推奨しています。
Roleの設定
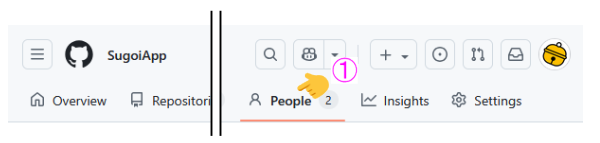
Organizationのトップページから、Peopleタブを開きます。
メンバーのリストが表示されるので、メンバーを選択します。
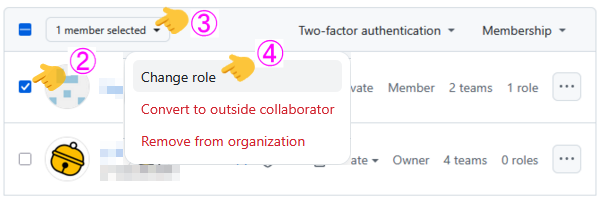
Roleを選択し、「Change role」で設定します。
Teamに対するRole
Teamに対するメンバーのRoleです。
Roleの概要
MaintainerとMemberの2つのRoleがあります。
「親・子・孫Team…」など、すべての階層でRoleの設定が可能です。
上位TeamのRoleは下位Teamへ引き継がれます。
| Role名 | 許可される権限 |
|---|---|
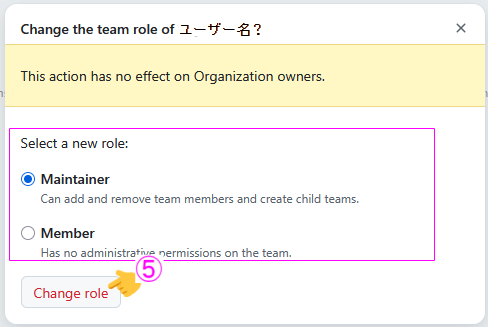
| Maintainer | Can add and remove team members and create child teams. ----- メンバーの追加と削除 子チームの作成 |
| Member | Has no administrative permissions on the team. ----- チームに対する管理権限を持たない(=チームに対して何もできない) |
Roleの設定
Organizationのトップページから、Teamsタブを開きます。
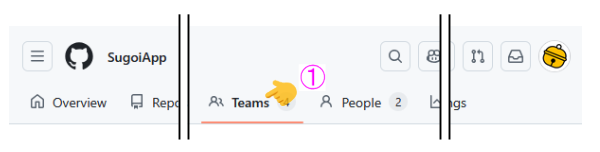
Teamの階層を辿り、目的のTeamへ移動します。
![]()
メンバーのリストが表示されるので、メンバーを選択します。
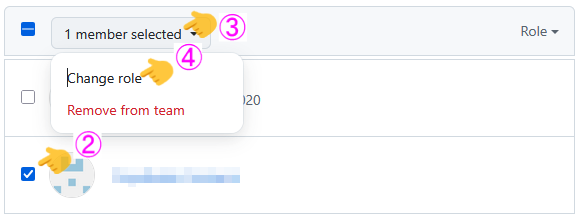
Roleを選択し、「Change role」で設定します。
Repositoryに対するRole
Repositoryに対するメンバーのRoleです。
Roleの概要
Read~Adminの5つのRoleがあります。
| Role名 | 許可される権限 | |||||
|---|---|---|---|---|---|---|
| clone | pull | push | issues | pull requests | settings | |
| Read | Read and clone repositories. Open and comment on issues and pull requests. | |||||
| 〇 | 〇 | 参照・コメント | ||||
| Triage | Read permissions plus manage issues and pull requests. | |||||
| 〇 | 〇 | 発行・参照・コメント | ||||
| Write | Triage permissions plus read, clone and push to repositories. | |||||
| 〇 | 〇 | 〇 | 発行・参照・コメント | |||
| Maintain | Write permissions plus manage issues, pull requests and some repository settings. | |||||
| 〇 | 〇 | 〇 | 発行・参照・コメント | 一部の操作 | ||
| Admin | Full access to repositories including sensitive and destructive actions. | |||||
| 〇 | 〇 | 〇 | 発行・参照・コメント | 全ての操作(※) | ||
| ※機密性の高い操作や破壊的な操作を含む | ||||||
表の上から下へ向かって、より強い権限になっています。
Roleの設定方法
Roleの設定方法は3つあります。
- (1)全てのリポジトリへ、ベースRoleを設定(Base Role)
- (2)全てのリポジトリへ、 Roleを指定(Organization access)
- (3)個別のリポジトリへ、 Roleを指定(Direct access)
ここでいう「ベースRole」とは、招待されたメンバーの初期Roleのことです。(1)で変更を行わなければ、デフォルトはReadです。
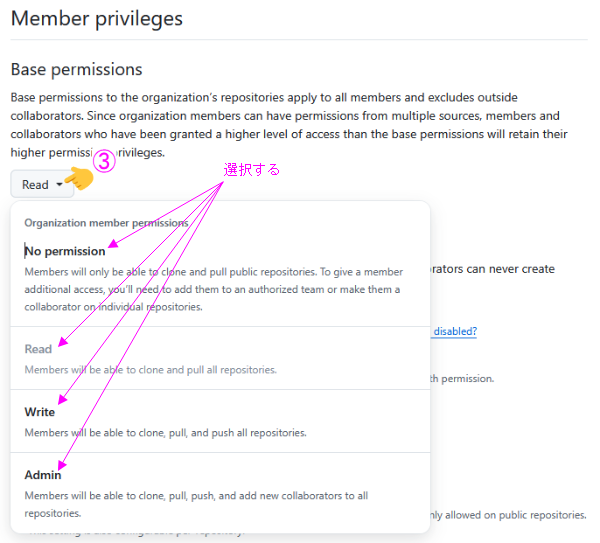
(1)Base Role
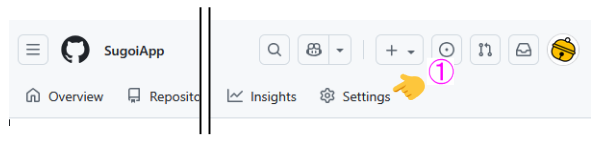
Organizationのトップページから、Settingsタブを開きます。
右のメニュー欄から「Member privileges」を開きます。
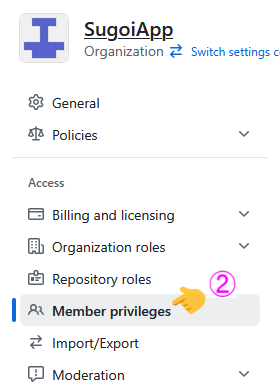
プルダウンリストを開き、目的のRoleを選択します。
(2)Organization access
Organizationのトップページから、Settingsタブを開きます。
右のメニュー欄から「Role assignments」を開きます。

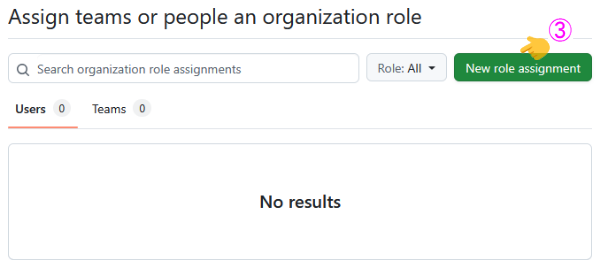
新しいRoleを定義するために「New role assignment」を開きます。
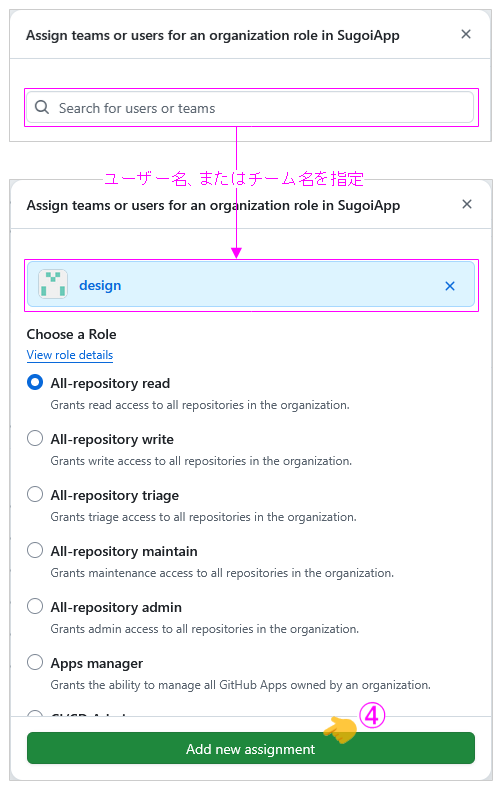
対象のメンバーまたはチームを指定し、目的のRoleを選択します。
(3)Direct access
Organizationのトップページから、Repositoriesタブを開きます。
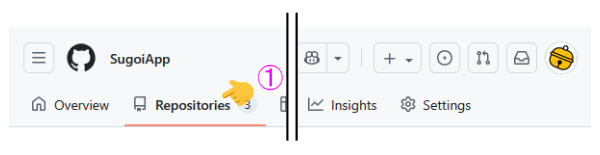
リポジトリのリストが表示されるので、目的のリポジトリへ移動します。

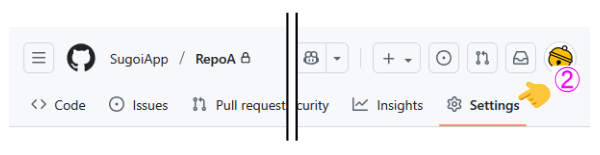
Repositoryのトップページから、Settingsタブを開きます。
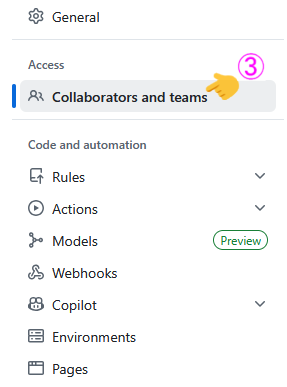
右のメニュー欄から「Collaborators and teams」を開きます。
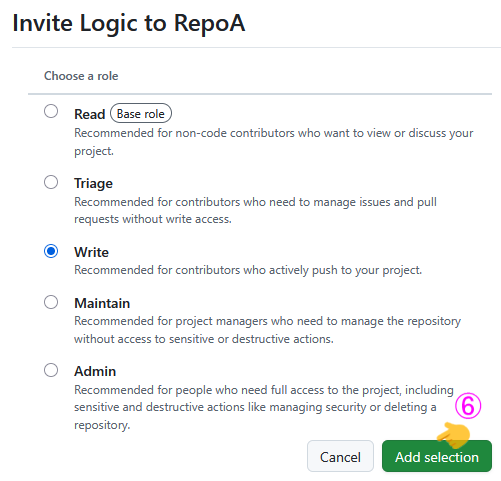
Roleを設定するユーザーまたはチームを選択します。
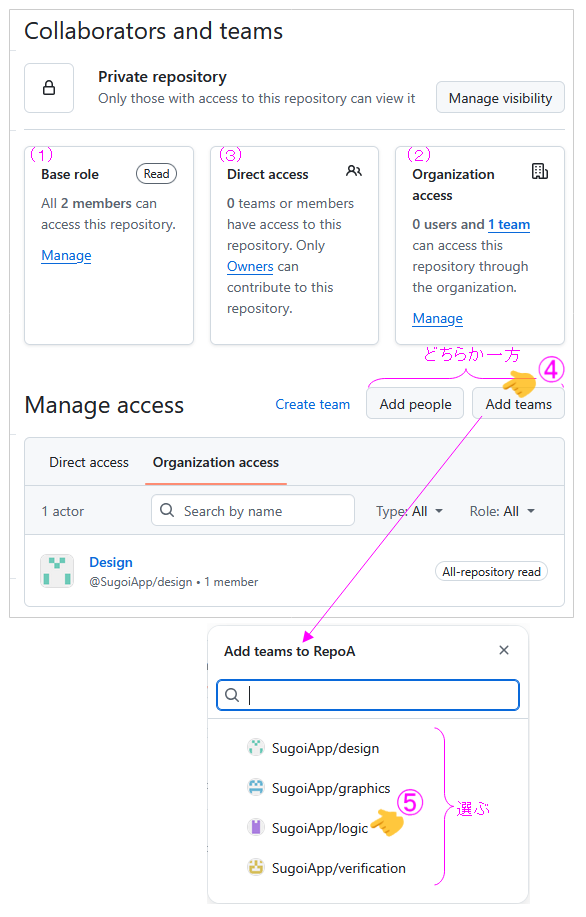
目的のRoleを選択します。
関連記事: