
Module Libraryの構築と参照方法について、まとめます。
※環境:Android Studio Bumblebee | 2021.1.1
Module Libraryとは
Android StudioはビルドツールにGradleを採用しています。
Gradleの開発環境は一つのプロジェクトから構成され、必要であれば子プロジェクトを作ることが出来ます。前者をRoot Project、後者をSub Projectと言います。
フォルダの構成は下記のようになります。
Root Project -+- Sub Project1
              |
              +- Sub Project2
              |
              +- Sub Project3
              :
              :
Project -+- App
         |
         +- Module1
         |
         +- Module2
         :
         :
このようなフォルダ構成をMulti Projectといい、Android Studioは正にGradleのMulti Project構成です。
Module LibraryはGradleのSub Projectをライブラリ化したものです。
ライブラリの提供範囲はプロジェクトになります。
ライブラリの構築
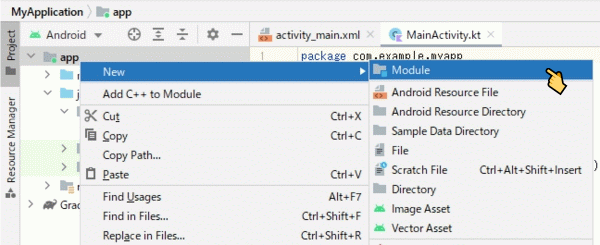
まず、Moduleを作成します。
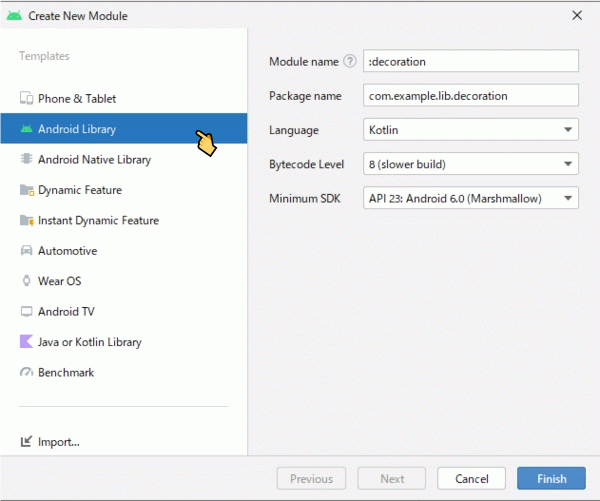
ModuleをLibraryにするためには、Android Libraryテンプレートを指定してください。
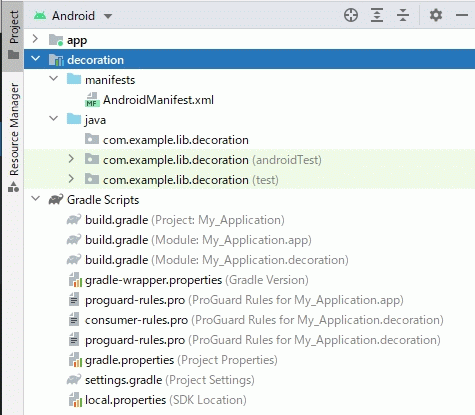
作成されたモジュールは次のようになりました。
build.gradleへライブラリ構築用のプラグインが指定されます。
※アプリ構築用のプラグインは「com.android.application」
plugins {
    id 'com.android.library'
    id 'org.jetbrains.kotlin.android'
}

android {
    ...
}

dependencies {
    implementation 'androidx.core:core-ktx:1.7.0'
    implementation 'androidx.appcompat:appcompat:1.4.1'
    implementation 'com.google.android.material:material:1.5.0'
    testImplementation 'junit:junit:4.13.2'
    androidTestImplementation 'androidx.test.ext:junit:1.1.3'
    androidTestImplementation 'androidx.test.espresso:espresso-core:3.4.0'
}
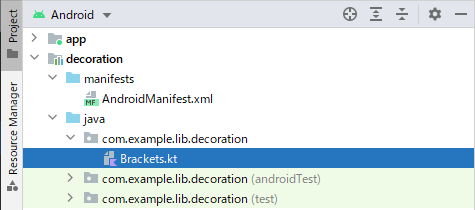
後は、ライブラリに追加するクラスを記述して行けば良いです。
ライブラリを個別にビルドする必要はありません。
package com.example.lib.decoration

/*
** メッセージ(テキスト)の両端をカッコで囲む装飾を施します。
*/

private const val START_CHAR = "("
private const val END_CHAR = ")"

class Brackets(var start: String = START_CHAR, var end: String = END_CHAR) {
    fun bracket(mesg: String): String {
        return "${start} ${mesg} ${end}"
    }
}

fun round(mesg: String): String {
    return Brackets().bracket(mesg)
}
fun angle(mesg: String): String {
    return Brackets("<", ">").bracket(mesg)
}
fun square(mesg: String): String {
    return Brackets("[", "]").bracket(mesg)
}
ライブラリの参照
build.gradleのdependenciesへModule Libraryの依存関係を追加します。
plugins {
    id 'com.android.application'
    id 'org.jetbrains.kotlin.android'
}

android {
    ...
}

dependencies {
    implementation 'androidx.core:core-ktx:1.7.0'
    implementation 'androidx.appcompat:appcompat:1.4.1'
    implementation 'com.google.android.material:material:1.5.0'
    implementation 'androidx.constraintlayout:constraintlayout:2.1.3'
    implementation project(path: ':decoration')
    testImplementation 'junit:junit:4.13.2'
    androidTestImplementation 'androidx.test.ext:junit:1.1.3'
    androidTestImplementation 'androidx.test.espresso:espresso-core:3.4.0'
}
サンプルの実行結果
サンプルの実行結果を示します。
import com.example.lib.decoration.Brackets
import com.example.lib.decoration.angle
import com.example.lib.decoration.round
import com.example.lib.decoration.square

...
{
    val _str1 = Brackets("#", "#").bracket("Hello World !!")
    println(_str1)
    val _str2 = round("Hello World !!")
    println(_str2)
    val _str3 = angle("Hello World !!")
    println(_str3)
    val _str4 = square("Hello World !!")
    println(_str4)
}
I/System.out: # Hello World !! #
I/System.out: ( Hello World !! )
I/System.out: < Hello World !! >
I/System.out: [ Hello World !! ]
Module Libraryの場合は、ライブラリを個別にビルドする必要がありません。
build.gradleのdependenciesへ依存関係が正しく記述されていれば、アプリのビルドと連携して、ライブラリのビルドも行われます。
関連記事: